Drink and Food

Saturday, March 17, 2007

Wholesale Tea and Fine Dining – The Secret is in the Loo

Almost everyone enjoys a first-class meal in a four star hotel or restaurant; the memory of a fine dining experience is one that lasts.

With a friend or loved one spending 2-3 hours in a first-class establishment can mark an anniversary, promotion, engagement, birthday or any number of occasions that deserve remembrance. Sitting in a richly paneled dining room with soft light, low music, a fine wine and delicious food topped by world-class service and a breathtaking view is a very pleasurable experience. If the meal is prepared and served correctly, very few diners will object to the high cost of the meal—indeed, many people believe a higher price reinforces the quality of the meal.

The Market is Competitive:

Fine dining restaurants, whether they stand alone or are found in a four or five star hotel, face very stiff competition. Quality chefs and maître d’s are paid generous salaries and bonuses and rating agencies like Zagat and the Washingtonian are constantly evaluating fine dining establishments; the loss of one’s rating can mean disaster.

The lodging industry is particularly competitive as hotels focus on customer service and satisfaction to discriminate their room offering from that of the competition.

Tea After the Meal:

World-class dining is an activity where attention to detail or lack of attention can ruin an otherwise good meal. If the service is slow or the food is not prepared perfectly, dissatisfaction is immediate particularly for high priced meals. Dissatisfied customers by word of mouth alone can damage an otherwise stellar reputation of a fine dining establishment.

One area that is often overlooked is the tea service at the end of the meal. Many restaurants offer the best coffee or espresso but overlook the serious tea drinker. Many restaurants end up serving a tea bag from a box with limited choices and then serve the bag in a cup of lukewarm water. High-quality tea must be steeped properly to ensure the proper preparation. In order to get the maximum out of tea steeping, whole leaf tea should be used; the taste and richness of the whole leaf is well presented during the steeping process.

Tea in bags, even whole leaf tea in bags, cannot compare to properly infused whole leaf tea. This is particularly true when the whole leaves have a chance to properly unfurl in a tea infuser instead of a cramped tea bag.

Tea bags are convenient and fast but many tea suppliers now offer large capacity or single service infusers and tea pots that not only provide the dining customer with quality tea but also can be private labeled with the brand of the hotel or restaurant.

Loose Leaf Tea is Gaining in Popularity

High-quality loose leaf tea is becoming more popular with fine dining restaurants and hotels as a way to complete the perfect meal and convince the customer that their presence is very much appreciated. The secret is a close arrangement between the restaurant as wholesaler and tea supplier as a provider of the highest quality loose leaf tea and teaware that will support the restaurant in serving its customers.

The Wholesaler – Supplier Relationship

The restaurant, as wholesaler, adds value by serving the best tea to its clientele as part of a perfect meal. The supplier serves the wholesaler by providing only quality products that are fairly priced with a substantial discount to encourage the wholesaler to carry its products. After-sale customer service on the part of the supplier is also critical.

It is not enough for the supplier to sell the products and walk away leaving the wholesaler to stand alone to deal with any potential problems. The wholesaler and supplier must cooperate with one another in order to satisfy a demanding fine dining market.

Sugary Sweet Emergency Recipe Substitutions or Ingredient Equivalents for Sugars and Molasses

It's a treat baking sweets, but running out of a crucial recipe ingredient can really gum up the works. Knowing an ingredient's "equivalent" or substitution can save the day. Many cake and cookie recipes can be adapted by using modern sweeteners if you don't have ingredients called for in vintage cookbooks or grandma's desert recipe. Today, Mom helps cooks in the kitchen with tips on granulated, brown, powdered sugars, and molasses.

Granulated Sugar - Most sugar is made from sugar cane or sugar beets. The plants are juiced, the liquid is boiled several times to separate out the molasses and the remaining clear liquid is crystallized into the familiar white granules on our tables. If you don't have 1 cup granulated sugar use 1 cup packed brown sugar OR instead of 1 cup granulated sugar use 2 cups powdered sugar.

You can also substitute sweet syrups for granulated sugars, but you'll need to remove some of the liquid in your recipe to maintain the correct moisture level. If you are baking it helps to add a leavening agent like baking soda. If you don't have the soda and you are not baking, then you can probably leave it out and still be ok. But this may effect texture and cooking times, so keep a closer eye on your creation.

If you don't have 1 cup granulated sugar use 1 cup honey + 1/4 tsp soda and reduce the liquid in the recipe by 1/4 cup. Honey is sweeter than granulated sugar. Or, instead of 1 cup granulated sugar use 1 1/2 cups molasses plus 1/4 tsp baking soda and reduce the liquid in the recipe by 1/4 cup. 1 pound (package) granulated sugar = about 2 1/4 cups granulated sugar.

Powdered Sugar - Superfine or powdered sugar is granulated sugar that has been spun into a powder. Used for a slightly smoother texture especially in frostings and fluffy meringues. When measuring you'll need slightly more powdered to make up for its fine grain. If you don't have 2 cups powdered sugar use 1 cup granulated. 1 pound (package) of powdered sugar = about 3 1/2 cups powdered sugar, unsifted (not packed).

Confectioner's Sugar - Confectioners sugar has been processed past the powdered sugar phase, into an even finer powder. Today the terms are used interchangeably, so check your packaging.

Brown Sugar - Brown sugar or sugar in the raw, has slightly more brown syrup, or molasses than white granulated sugar and is slightly less sweet. As a result, brown sugar has a smokier flavor and darker color. Golden brown sugar has less molasses than dark brown sugar. The two can be used interchangeably, but note the darker sugar will have a richer flavor and color and is generally better if you're cooking pork.

If you don't have brown sugar use granulated sugar instead using the exact same measurements. You can also make brown sugar by combining 1 cup sugar with 1/2 cup molasses, but this may throw off the liquid in your recipe, so be careful using this substitution when baking cakes.

Brown sugar will remain soft if it is kept in an airtight container. To soften brown sugar place it in an ovenproof container and warm at 250 degrees until soft, or microwave on high for 30 seconds at a time until soft. Use it immediately as it will be harder than before when it cools! A 1 pound package of brown sugar equals about 2 1/4 cup firmly packed brown sugar.

Molasses - Molasses has a dark, sweet, smoky taste. It is created during the sugar refining process. Molasses is slightly less sweet than granulated sugar. Until sugar prices fell in the 1930's molasses was the primary sweetener in American kitchens. Sulphur dioxide is sometimes used to make molasses sweet. The term 'unsulphured molasses' just means sulphur was not used in the creation of your molasses and it should be the lightest and sweetest type. Measuring molasses is easier (and more accurate) if you grease the measuring cup first with a little cooking spray or butter. One 12 fluid ounce jar of molasses equals 1 1/2 cups. One cup equals 8 fluid ounces.

If you are making a vintage recipe I heartily recommend you spring for a jar of molasses. Molasses is the secret ingredient in many cookies, cakes, ham glazes and BBQ sauces. Granulated sugars will not taste the same. If you have a jar left over, you can use molasses in baked beans, ham, oatmeal, ice cream or added to syrup and butter on pancakes. One tablespoon of molasses provides 8% of your daily recommended iron and 4% of your calcium!

One cup of molasses equals1 cup honey. Bear in mind honey is sweeter than molasses and will change the flavor slightly. OR instead of 1 cup of molasses try 3/4 cup granulated sugar (brown is preferable) plus 1/4 cup water. The extra water (or other liquid) is called for to make up for the moisture in molasses. It is important to replace it if you're baking cakes or breads. Blackstrap molasses is the thickest, darkest and least sweet type of molasses and isn't recommended for baking.

Sugar Baking Tip: Baking relies on a bit more science than your average frosting recipe. Not only do the ingredients add flavor, they may also serve a specific function like making your cake rise, or binding ingredients together. For best results when baking, measure all your ingredients accurately; like leveling off your measuring cup with the edge of a knife and setting the cup on the counter when measuring liquids. When you resort to a substitution just be aware that your texture or flavor may be slightly different. For more of Mom's kitchen tips and apron humor visit her on the web at http://www.MomsRetro.com. Good luck and happy cooking!

Friday, March 16, 2007

How To Make Of Soup Preparation Something Easy

How to make of soup preparation something easy

Feel free to create as you wish! Use any combination of vegetables you want and to make a complete meal of a soup, just cut up any leftover (ccoked) meats and add at the last minute. If you have some frozen shrimp in the freezer, you can always cook them at the last minute by throwing them into the soup and leaving them to cook until they are no longer see-through. Then serve at once.

Three of the simplest techniques:

1. Basic Cream of Vegetable Soup.

Peel, wash and cut in big chunks any vegetable(s) that you want. Cover the vegetables with enough salted water (about 2 quarts of water to 2 teaspoons of salt) to cover them by an extra inch. Bring to the boil on high heat, cover with a lid, turn down and slowly boil for about 40 minutes (or until vegetables are soft all the way through). Remember, the thicker the chunks, the longer the cooking time.

Then blend by putting a handheld blender directly into the pot and blending the vegetables. The longer you blend, the smoother the soup. Add a little half and half or heavy cream if you wish. Some suggestions for soup ingredients are: the whites of leeks with zucchini in about equal quantity, cauliflower by itself or with another vegetable, edible pumpkin (found in Spanish markets), any kind of squash and frozen green peas, potato etc. Onions are always good in almost any soup along with the main vegetables but not as the main ingredient, just one small one. Experiment for yourself and see what you and your family enjoy.

2. Better-Tasting Cream of Vegetable Soup

Using the same suggestions as given above, the tastier soup takes a little more time and 1-2 tablespoons of olive oil or butter. Peel, wash and cut in big chunks any vegetable(s) that you want. Saute for 3-5 minutes in a little oil, olive oil or canola oil or a blend of the two or butter. Make sure that you don’t brown the vegetables, as it will change the taste.

Put in a pot with water (enough to cover vegetables by an extra inch) and salt (and pepper if you like). Bring to the boil and turn down to a slow boil and cook for about 40 minutes (or until vegetables are soft all the way through). Remember, the thicker the chunks, the longer the cooking time.

Then blend by putting the hand blender directly into the pot and blending. The longer you blend, the smoother the soup. Add a little half and half or heavy cream if you wish.

3. Chunky Vegetable Soup.

Peel, wash and cut in small chunks any vegetable(s) that you want. (If you want to make minestrone, use zucchini, carrots and at least two other vegetables that you want, usually making sure that one of the cabbage family is represented, like cauliflower, broccoli, cabbage or even just the leaves or well peeled stalks or these vegetables.

Sautee (in a pot) for 3-5 minutes in a little oil, olive oil or canola oil or a blend of the two or butter. Make sure you don’t brown the vegetables as it will change the taste.

Add enough water to cover the vegetables by an extra inch and salt (about 1 tsp per quart) and pepper, if you wish. Bring to the boil and then turn down to a slow boil and leave to cook for about 40 minutes (or until vegetables are soft all the way through). Remember, the thicker the chunks, the longer the cooking time. Add a little half and half or heavy cream if you wish, just before serving.
Jean-Louis Vosgien as a food consultant has created numerous recipes for restaurants in many countries.
www.photos-and-recipes.com

Baking Cakes - Creative And Fun Ideas For The Whole Family

I love to bake! I came on the internet looking for new ideas and recipes that I could share in the fun with my children. My boys love to crack the eggs, use the mixer and fight over the beaters! We have all been there. As a child I love to like that mixing tool. And a secret…, I still sneak some baking in after the boys go to bed just so that I get a chance to indulge. I enjoy making cupcakes. After the fight is over and the cupcakes are in the oven we mix up the icing. We make a bunch of different colours. Once the cupcakes cool, we have a decorating party. The boys enjoy this part. They usually eat the icing instead of putting it on the cupcakes. It is so enjoyable to watch the boys use their artistic skills. We also make tones of memories. I am now venturing into a new cake. It was my sisters 35th birthday and I made my first shaped cake. I did not use a “pre made” tin. It was all free hand. I made a wine bottle. I used a rectangle baking dish for the bottle and a loaf pan for the neck of the bottle. I cut it into the shapes needed and trim the edges to make it look like a bottle. I also filled it with cherry filing. You will need glue to keep all the parts together, which I used the icing. After it sat in the refrigerator overnight to harden a bit, I use the icing bag with a Wilton tip #18 to decorate it. It took about two hours to decorate it. It was a lot of fun. To see a picture please visit my blog page. There are a lot of websites on the internet that can help you give your cupcakes and cakes the extra touch that they may need. I have found sites where you can purchase accessories for your cakes. This helps me get my creative juices flowing. These products are inexpensive as well. I also found that it is less stressful to bake if you have the right tools ie: icing bags, tips, icing knifes and all the eatable decorations close by. I am no pro at the art of baking. But I was quite surprised by what I was able to do. My husband has volunteered me to make all the birthday cakes for our family members. For my birthday, the request will be an ice cream cake… my favourite! They are so easy to make. Two quick suggestions for the ice cream cake… 1. You need to work quickly and 2. Make sure that the kids are in bed or there will be no ice cream left for the cake. You can always start with a vanilla base and add anything to it like smarties, oreo cookies, nuts, fruit, etc. There are endless recopies for the ice cream cake. So if you want to bring joy to your children’s heart and make great memories with your family I challenge you to get your fingers covered in fun and try your hand at “creative cupcakes” and “funky cakes”. Let your inner child out and your imagination run wild. THE POSSIBILITIES ARE ENDLESS!!

Why Drink Green Tea – Three Reasons To Enjoy A Popular Beverage

After water, tea is the most consumed beverage in the world and there are good reasons for this popularity. One of the most popular forms of tea is green tea and there are a number of reasons why so many people enjoy this beverage.

First, green tea is flavorful and there are many varieties of green tea. The difference between teas is the amount of oxidation that the leaves are exposed to. Green tea is not oxidized meaning the enzymes in the tea leaf are not exposed to any oxygen found in the air. By contrast, black tea is fully oxidized and oolong tea is partially oxidized. When dealing with tea taste is a matter of degree and a function of oxidation.

Green tea comes in many forms and blends and is popular in every country and culture. Originally produced in China, the consumption and popularity of green tea spread throughout Asia, India and the western world. With the addition of flavors and blends like Jasmine, Vanilla, Mint and varieties like Jasmine pearls, Sencha and Gunpowder, green teas are subtle and appeal to the varied tastes of tea drinkers.

Green tea has a unique light taste that appeals to a very large number of drinkers throughout the world and has been popular since tea was first discovered over 5,000 years ago. It is one of the five basic types of tea and is recognized by even the most novice tea drinker.

Second, loose leaf green tea has been one of the mainstays of the tea culture. The highest quality tea is loose tea and premium quality loose tea has gained in popularity in recent years. Green tea drinkers enjoy preparation rituals and ceremonies that add ambiance to the tea drinking experience. Whole leaf green tea has served as the basis of tea rituals in China and Japan and, properly served, the tea ritual provides a pleasant experience after a stressful day.

When China was the sea power of the world (1405-1433), tea was among the indispensable supplies for the seamen. The amount of vitamin C in the tea drink consumed by the seafarers at that time was enough to prevent scurvy which would kill many European sailors more than 100 years later, but was essentially unknown to the medical officers assigned to the fleet of more than 27,000 men on their round voyage from China to Africa.

Lastly, there are strong indications that drinking green tea (and all types of tea for that matter) is very healthy for the human body. Throughout the years tea has been prized for its medicinal qualities and the consumption of tea became a regular event for most families.

Tea has been used in China as a medicinal beverage to promote health in mind and body for about 5000 years. The earliest known reference to tea as a health aid dates back to 2737 B.C. Tea was an expensive beverage in ancient China. Its use was confined to the wealthy segments of the population. Only in the Ming dynasty after the fall of the Mongolian empire in 1368 A.D., tea drinking spread from the elite to the populace. The first shipment of tea to Europe in 1606 by the Dutch East India Company was green tea

In 1994 the Journal of the National Cancer Institute published the results of an epidemiological study indicating that drinking green tea reduced the risk of esophageal cancer in Chinese men and women by nearly sixty percent.

University of Purdue researchers recently concluded that a compound in green tea inhibits the growth of cancer cells. There is also research indicating that drinking green tea lowers total cholesterol levels, as well as improving the ratio of good (HDL) cholesterol to bad (LDL) cholesterol.

A recent Japanese study, reported by the Journal of the American Medical Association (JAMA) reported that adults in Japan who drank more green tea had a lower risk of death from all causes and from heart dis¬ease.

In addition, compounds in green tea called polyphenols have been much studied for possible heart disease and cancer preventive effects. Although further study may be required to prove absolutely that green tea produces measurable health benefits, the consumption of green teas throughout history add credence to recent medical claims.

Making Tea 1 - How to Brew a Great Cuppa

It is amazing how few people know how to brew the kind of refreshing, invigorating tea enjoyed by the English-speaking world for a couple of centuries. This is by far the best way for strong black teas such as Assam from India, Ceylon from Sri Lanka and blends like English Breakfast.

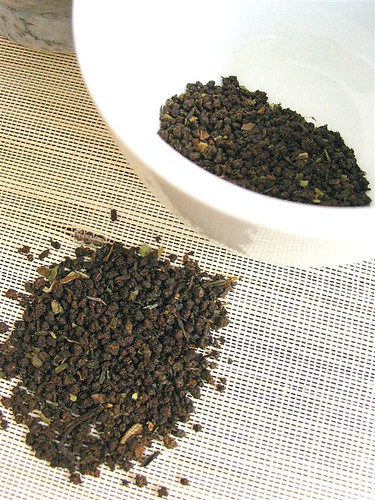
These teas are dark in colour with a strong tea aroma and are made up of small pieces of broken leaf. They have been withered and air-dried to develop the distinctive colour and flavour, which gives them a high content of the stimulants theophylline and caffeine. They must be infused with really boiling water for a short time, and develop a very unpleasant bitter or stewed flavour if brewed too long.

The critical factors are quality equipment and materials, cleanliness and maximum flavour extraction. That means you must have really hot water and stir the pot! The method given here is simple and reliable, but can always be varied to suit individual tastes.

You will need:

  1. Good quality, fresh strong black tea
  2. Heavy china teapot with a good spout
  3. Fresh, clean, soft water
  4. Kettle, electric preferred
  5. Tea strainer, stainless steel with fine mesh preferred
  6. China cups or mugs, preferably 200ml or larger
  7. Skim or low fat milk (optional)
  8. Tea cosy to keep teapot warm (optional).

I have not mentioned lemon, sugar or teaspoons since these are all quite unnecessary to enjoy good tea. The teapot, kettle and strainer must be clean as any residues from previous use will affect the flavour.

How to proceed:

  1. Put the water on to boil: about 1 cup (250ml) per person, plus 1.
  2. Pre-heat the teapot by pouring a little very hot water in it from the kettle, just before the water boils. The teapot should feel very hot to the touch.
  3. As the water reaches the boil, pour the hot water out of the teapot.
  4. Add tea to pot: one good, heaped teaspoonful (about 4g) per person, plus one “for the pot”.
  5. Pour the boiling water directly onto the tea.
  6. Stir vigorously with a spoon. Most of the flavour is extracted during these first few seconds, so this step is crucial.
  7. Leave to stand for 3-4 minutes. Any longer and the tannins will start to be extracted, giving the tea that woody or stewed flavour. Cover teapot with tea cosy if room is cold or draughty.
  8. Pour a small quantity of skim milk into each cup (if liked). About 1 tablespoon or 20ml is enough. If there is only full cream milk, use less.
  9. Pour the tea into each cup using the strainer to catch leaves (there should be a few).

All the tea should be poured at once, leaving a little in the pot. Second cups are never as good as the first, so aim to make that first cup large enough!

The tea as poured should be a deep coppery brown, and even with milk added should be a rich coppery brown rather than milky white. The tea in the cup (or mug) should be drinkable for 20 minutes or so, and this time can be extended by covering the cup with a lid.

For a variation, use twice the amount of tea and an even shorter brewing time. This stuff has a real kick! Enjoy!

Thursday, March 15, 2007

Creating A Quality Pizza

More than 90% of Americans consume a slice each month, but do we get what we are looking for? What is it? Pizza, the industry that produces more than $30 billion on a yearly basis. So do you know if the slice of pizza your consuming is up to par?

Isn’t it what all pizza lover’s are looking for? A quality pizza! So let’s take a look at what makes a quality pizza. A quality pizza is a pizza that produces three unique qualities. First is appearance, if it doesn’t look good then how do you think it is going to taste? The appearance of a quality pizza should have correct topping distribution. This means toppings over the whole pizza, no center loading. Center loading is when the majority of your toppings are in the center of your pizza, this often results in a doughy pizza. Another aspect of correct toping distribution is the amount of toppings on the pizza. This means that the more pizza toppings you order, the less you get. It sounds harsh, but it really isn’t. Please read on and I’ll explain why.

The baking of the pizza is the second unique quality of pizza appearance. The bake of a pizza is vital, consumer’s aren’t looking for a doughy pizza or a pizza with a burnt appearance, consumer’s want their pizza baked just right! Here is a little insight on how they achieve the proper bake of a pizza. The bake of a pizza depends on a few things, proper bake time, temperature, and toppings. Pizza shops spend countless hours every year perfecting the correct bake time and temperature. Time and temperature should be checked on a regular basis because they always need an adjustment tweak here and there. The adjustments could be due to the in store temperature, weather, cleanliness of the oven or thickness of toppings. I believe the most important aspect of the bake is toppings! Every pizza topping has a proper amount that should be placed on a pizza, but when you order multiple toppings, it would be impossible to place that single topping amount on the pizza simply because it wouldn’t cook properly. To give you a visual, think about this: An order is placed for a pepperoni pizza and let’s say that the proper topping spec. for a 1 topping pepperoni pizza is 50 pepperonis. With the proper amount of pepperonis on that pizza, it would cook properly. Now lets say there is an order placed for a 4 topping pizza; pepperoni, sausage, onion, and mushrooms. If a pizza shop used the 1 topping spec for all 4 toppings, the pizza would be to thick to cook properly. The end result would either be a doughy pizza or a very well done pizza because the pizza shop would have to bake it longer to try and cook the pizza the whole way through. In order to have a proper bake on a 4 topping pizza, the pizza shop would need to cut back the topping amount around 20%.

The final aspect for the quality pizza, is the taste.

It’s want we all want, a great tasting pizza. We all have our favorite pizza shop that we order from. Why? Is it because it actually taste good or is it because of the appearance of the pizza? We are all unique and we all have our own taste and desires, but it may just be that physiological thing we also have. If you see a pizza that is perfectly created and appeals to your eye’s, most of the time it is going to taste good! That is why all pizza shop’s place a strong emphasis on appearance of their product. When it simply looks good, it’s going to taste good! Yes, it is true, there are many pizza shops that have a great tasting product, that may not look superb, and you know who they are! The decision is up to you, so let’s all grab some pizza coupons and call our favorite pizza shop for that 30 minute meal!

Microwave Cooking Tips - Cooking Microwave Meat

As a busy individual, the least that you would focus your spare time to is cooking your meal. Going through drive-through fast foods will not usually equal the home-made cooking that you can get. If only you have sufficient time to attend to the busy preparations in cooking. As you know, cooking meat can be a really taxing work especially if you lack adequate time for this thing. So what is the microwave doing? Don't just let your microwave oven sulk in one corner of your kitchen. Make use of it and cook your meat!

Cooking meat in the microwave oven? This can be a big NO for most people. They will oppose to this idea, so to speak. Their reason will usually be the same as their usual claims that the chicken meat can eventually end up feeling like a rubber and that the ground beef will not be entirely cooked. But these things can be a myth after all! Why so? Because if only you know of the microwave cooking tips for meats, you will not say the same thing. The secret i know the right types of cooking utensils to be utilized!

There are clamors against the use of plastic materials in cooking food inside the microwave. Yes, there are those unsafe plastic utensils which may be harmful for the meat that you cook. It is because some of the plastic containers include certain chemicals in their overall make-up which get triggered due to a high rate of heat in the surroundings. In turn, these chemicals will get mixed up with the food inside the microwave oven. Again, as emphasized earlier, one of the effective microwave cooking tips for meat is to employ only the proper utensil. There are basically containers which are obviously designed for microwave cooking.

One safe microwave cooking utensil to be used is the Tupperware. If you are sure that the container which you are about to employ is fit for microwave use, then you can be guaranteed that no sorts of chemicals can get activated although there is too much heat inside the microwave oven. One utensil again, the Oval Cooker, is particularly styled in a way that the meat moisture is kept so that the meat does not end up to be rubbery and dry.

When you are cooking beef remember to cook each pound beef for about 6 minutes, and let the meat wait a few minutes before you take it out. When cooking a whole chicken the cooker must be filled in with half cup of water in the bottom part, and like the beef it take about 6 minutes for each pound. This time can be different in some microwaves depending their power.

As opposed to the prevailing opinion that it's not possible to cook food in microwaves, you find out that you can, but there is a few cooking ways & instruments that can help you achieve this goal, try it first with small amounts of meat and after a few times you will be able to cook the meat exactly in the way you like it. From this point it will be easy for you to make your meal using this tip and impress all you friend and family.

Magical Cakes For St. Patrick's Day

Lucky Leprechaun's Hat

This design calls for a dome cake and a slightly wider, round cake layer. If you don't have a dome cake mold, use an oven-safe glass bowl.

Torte and fill the dome cake. Using green tinted buttercream, ice the round cake. Before the icing crusts, place the dome on top and ice it.

Give the leprechaun's hat a wide band that you create with chocolate buttercream or a ribbon of chocolate fondant. To pipe the hatband, you can use a strip of evenly cut paper to create an imprint, and then, using a star tip, fill in the band.

Next, pipe a gold buckle (with orange-yellow icing) onto the hatband. For a magical touch, apply edible gold glitter to the buckle.

Note: While edible gold glitter isn't cheap, you can find some good deals online. Large craft stores such as Michael's may also carry this.

Then pipe a large shamrock onto the hat. If you'd rather not do this freehand, make an imprint by pressing lightly onto the icing with a shamrock cookie cutter. Then using a start tip and dark green icing, fill in the shamrock. For an extra festive touch, serve with Irish Coffee.

Here's what one reader had to say about our "Cake Decorating Made Easy!" Video Books:

"This is a must have for all your cake decorating needs. They go over the basics in easy 'layman's' terms...very detailed. Great asset to anyone's cake decorating library."

Betsy Jacob, Fulton, MO

And here are more decorating ideas for magical St. Patrick's Day cakes:

  • Create a character cake with an easy-to-use character pan decorating kit, except add a St. Patrick's Day variation: whip up some green buttercream and add some leprechaun mischief like a green bow tie and shamrocks.
  • Decorate a sheet cake with an "end of the rainbow" scene. Ice the cake with pastel blue for the sky and green for the emerald meadow. Pipe tufts of green grass. Then using an icing bag, round tips and buttercream, decorate with a rainbow, white clouds and a pot of gold. Pipe gold nuggets and sprinkle with edible gold glitter. If you enjoy modeling with marzipan or sugarcraft, create a three-dimensional pot of gold filled with little gold wrapped candies. Then pipe a St. Patrick's Day message. Highlight with edible gold glitter. Finally add leprechaun figurines, store bought or sugarcrafted.
  • Create a pot of gold cake. Ice a round cake or an upside down dome cake with yellow buttercream. Craft or purchase a rainbow arch that you can set up on the cake. Model nuggets and coins with marzipan or fondant, and then coat with edible gold glitter. Lavishly decorate the top of the cake with these.
  • Bake an Irish Coffee cake and liberally top with freshly whipped cream. Decorate with shamrock cake confetti and leprechaun party picks. Serve immediately.
  • Create a charming cake, literally. Purchase Irish good luck charms, one for each guest. Thread each charm onto a clean, green ribbon. Bake an angel food or bundt cake and glaze. Drop the charms inside the center of the cake, and drape the ribbons over the cake. Before slicing, each guest draws a charm.
  • Alternatively, charms can be added as they often were to Victorian wedding cakes. To do so, bake round cakes. While filling, place the charms around next to the edge before placing the top layer. Allow the ribbons to emerge over the sides of the cake. After the cake is presented, each person pulls a charm out.
  • Remember the green when selecting a cake recipe. Use white or yellow so that it can be easily tinted green. You might even want a green filling such as pistachio pudding. Not nuts about pistachio? How about key lime?
  • · Bring a wee bit of Irish charm to your cupcakes. Buy a box of Lucky Charms cereal (this magical leprechaun has been entertaining at breakfast tables for over 40 years!), pour into a large bowl, and take out all of the marshmallow charms (you have permission!). After frosting the cupcakes with pretty swirls of green buttercream, decorate with the magical four leaf clovers, blue moons, shooting stars, leprechaun hats, purple horseshoes and pots of gold.

Finally, here's a Cake Decorator's version of the Irish Blessing for you:

May the road rise to meet you, May the wind be always at your back, May all your cakes bring a smile to your face!

Charcoal Or Gas Grilling - Which Is Better?

Summertime just isn't the same without a backyard barbeque. If you are considering buying a grill you might be wondering which type to get. You can get a gas grill, a charcoal grill or a smoker. There are many things to consider when you try to make your decision. Keep reading and learn the advantages of each.

The most common grill nowadays is the gas grill. Powered by propane gas this type of grill has many advantages. The biggest benefit is the convenience factor. Gas grills are ready to go almost instantly and cook food fast. This type of grill makes it convenient to cook on almost all of the time. The disadvantage to a gas grill is that it adds no flavor to your food. You do not get any of the flavor of a charcoal or wood burning grill.

The next type of grill is a charcoal grill. The great thing about this type is that you get more flavor in your food from the wood or charcoal. It is also more traditional and may bring back family memories from your past. The downside to the charcoal grill is that it takes longer. You have to preheat the coals or wood before using it.

The last type of grill and my favorite is the smoker. Smokers have all of the same benefits of a charcoal grill but they can also be used to smoke meats. There is nothing better than a brisket that has been in a smoker for 6 hours. Smokers have all of the same negatives as a charcoal grill however so they do require more time.

Whichever type you decide I am sure you will be happy. Just be careful and shop around for the best deal. Prices can vary greatly from store to store. Pick a grill that is reasonably priced but not cheap. Like everything else, you get what you pay for.

Can Openers- Then And Now

A can opener is a handy tool to open up any cans but in today’s scenario it is not that easy to choose from the wide verity of can openers available in the market. The basic purpose of a can opener is to open up the cans with ease but the new age can opener not only complies with its basic duty but also performs many other tasks like knife sharpener, tool holder etc. Thus the can opener is proving to be more and more like an integral part in the kitchen.

But do you know that when the can was discovered in the early 1810 it used to be made up of such hard material that it used to be hammered to take out the contents, leaving absolutely no requirement of a standard can opener. That is the reason of the first can opener to be discovered after almost 50 years of the discovery of can. Strange but true, the first can opener came into picture only after the lids started to be made up of soft material so that it was possible to rip it off using a can opener and that happened 50 year later.

Since that time the can opener has undergone many changes to minimize human effort and to make the whole process easy to operate and hygienic. Many designs today are very handy and more hygienic to use. Can openers today are available in mainly two types viz. manual and electronic or automatic. Many manual can openers have changed in a slow process and many of them haven’t changed at all like the classic p-38 can opener. The p-38 for example is the simplest design of a can opener and plays many roles as a handy pocket tool. Designed for the army use this can opener was supposed to perform many tasks without a problem. But the electronic or automatic can openers have evolved fast. The purpose of an automatic can opener is to reduce human effort and the electronic can openers are successful in doing so. They easily rip through the lid of almost any size of the can without you assisting in the process.

While choosing a can opener one has to review the can opener on many important aspects. First is to decide whether it should be manual or automatic. The manual can openers are not dependent on electricity and can be carried to camp sites as well. Second aspect is the space it will acquire on the kitchen table. The best can opener is the one which can be stored in a lesser space. Third aspect is the quality of its blade; a good can opener comes with a sturdy which easily rips through the lids without leaving jagged edges which can be dangerous while handling the can. If the can opener is an automatic one another important factor is its motor, a powerful motor insures smooth working of the opener. The most important factor while choosing a can opener is hygiene. Ensure that the can opener you are planning to buy comes with a magnetic lid lifter or lid pliers. It is important as the magnetic lid lifter holds the lids while the blade cuts it apart and prevents it from falling into the food inside the can. This reduces the risk of food contamination and proves to be more hygienic. Also the can opener should be easy to wipe clean along with the blades. This helps maintain the cleanliness.

What Are The Best Grilling Steaks?

You have just purchased the outdoor barbeque you have always wanted, and now you are ready to break it in. Your mouth is watering for a juicy steak, and you are anxious to impress your guests with your new barbeque and grilling skills. But do you know what the best grilling steaks are to use? You may have the perfect marinade in mind, as well as your own special blend of seasonings. Choosing the right type of meat is just as important as the type of flavoring you use.

While so much of steak grilling is subject to individual taste palates, some steaks lend themselves very well to barbequing endeavors. There are a number of factors to keep in mind when choosing cuts of beef for grilling. For example, one aspect to consider is the amount of marbling on the steak (i.e. how much fat the beef has running through it). While many people insist on avoiding the fat, it is actually this fat that contributes significantly to the flavor of the beef when its cooking. Some people instinctively choose top sirloin, because it is leaner and tends to be less expensive. However, because of its low fat content, sirloin steaks tend to also dry out faster and be less juicy, as well as a little tougher. On the other hand, porterhouse, T-bone, rib eye and rib steaks will have a healthy amount of fat, which will make the steak especially appetizing when grilled. In addition, the marbling on a steak helps to insulate the meat and keep it from overcooking.

In general, the most tender steaks available are tenderloin and strip (also called New York) steaks. But porterhouse and rib eye steaks can also be quite tender and flavorful, which means that you can have great-tasting grilled steaks for your guests without breaking the bank. Keep in mind that porterhouse steaks are especially flavorful, not only because of the level of fat, but because they also have a section of tenderloin on one side of the bone and a section of strip steak on the other side.

Another factor to keep in mind is the type of grade of the beef you are buying. The U.S. Department of Agriculture assigns specific grades to meat according the level of quality of the beef. Prime grades are considered the best, but these are widely used by restaurants and tend be bit a little harder to find in the average grocery store. However, many supermarkets have begun carrying some cuts of prime beef in small amounts, and you may be able to secure prime cuts from a local butcher as well. These cuts are a bit more expensive. They tend to have to most marbling in them, making them especially juicy. Alternatively, Choice grade steaks will work wonderfully for barbequing, as they still have a generous amount of marbling in them. Select grade beef will tend to be the least tender, they can dry out quickly, particularly if you are relatively inexperienced with your grill.

The thickness of the steak you choose will also determine the kind of results you will get when using the steak on a grill. A relatively thick steak will help to keep the meat from drying out too quickly or overcooking. As a guideline, you should always choose steaks that are at least ¾ of an inch thick. Ideally, you should shoot for steaks that are about one inch to an inch and a half. Finally, you should know how long the steaks have been aged. Beef cuts that have undergone some degree of aging are likely to have characteristics that is more tenderized and mellowed in flavor. Whenever possible, ask your butcher about the age of the steaks you intend to purchase.

Overall, it pays to know your cuts of beef and the quality of the beef. The more information you have about the steaks you intend to grill, the more effective choices you can make…

… and your guests will love you for it!

Baking Traditions - What Happens to Lost Recipes

Do you having baking traditions in your family? Is there one thing that you always bake together during a holiday? Is there one recipe that has been handed down from generation to generation? Have you shared those traditions and recipes with anyone?

This is a subject that really hits home for me because I lost some of our family recipes recently. It made me think about what happens to a recipe if no one knows about it or cares about where it goes. Nothing happens to it. It is lost to the world and may never be found again. What a truly tragic end for a great recipe (especially a baking recipe!). A wonderful cookie, pie, or cake is never made again. I really love sweets so this truly brings a tear to my eye!

A recipe is a gift. A gift of love. A gift of time and effort. A gift that can keep on giving because each time you make it, you enjoy it again. It is not only a gift from the person who created the recipe but also a gift from the person who gave it to you. Treasure those gifts and share them. A recipe and story shared is worth more than one just sitting in your recipe box. Perhaps you are waiting for just the right person or time to share it. I have been guilty of that one myself. But a recipe that isn't shared is nothing but a piece of paper in box. It means nothing to anyone but you unless it is shared with someone else.

So how do you make sure your recipes and baking traditions are not lost?

Write them down. Of course your recipes are already written down in some form or another. But what about the funny family story or family baking tradition that goes with it? Make sure that story gets written down too.

Make sure someone in your family knows that this recipe and this family baking tradition are important to you. Make sure that they know you want it to be passed on in the family. No one will know how important it is to you unless you tell them. (So speak up!)

And last but not least, your baking assignment (should you choose to accept it) is to share one of your baking recipes (and the story that goes with it) this week with someone. Who knows, you may just start a baking tradition for that person and their family. And what better way is there to honor the gift of that recipe?

Happy Baking!

Most Famous Bengali Recipe

Bengali sweets or Misthi are the integral part of all the celebration in Bengali families. "Misthi Mukh" (sweetening the mouth) is ritual followed in bengali home whenever there is good news.

Some of the mouth watering dishes are : Manohara, Payesh, Dilkhsh, Misti doi, Nalen gurer sandesh, Rasomalai etc. During sankranti ( a post-harvest celebration in January) Pithae like chanar pithae, a coconut and chana dal sweet; Patishpata, a coconut filled pan cake etc are prepared. All bengali sweets are usually Chenna or cottege cheese based, this is unique feature as in other part of india sweets are usually khoya based or dey sweets like besan ka laddu or modak or boondi ka laddu.

Specialty of Indian recipe is use of spices and herbs in most the cuisine and longstanding and widespread practice of vegetarianism in Indian society. India is multi-society, multi-culture, multi-religion and multi-state country. These variety is clearly reflect in Indian Cuisine and recipe. Indian cuisine is characterized by a great variety of foods, spices, and cooking techniques. Furthermore, each religion, region, and caste has left its own influence on Indian food. Certain part of west bengal have come to be associated with and famous for peticularswets named Bardhman - famous mihidana and shitabhog (both are made of chenna in syrup). One of bngal most famous exports is "Chenna ka rasogolla" and more famous and mouth watering recipe is sandesh(made from chenna).

Kid's Birthday Party Recipes

You can treat the birthday party guests to fun-to-eat snacks! Many of these recipes can be adapted to match a party theme of your party. Providing individual cupcakes for each guest is a fun way to celebrate a kid’s birthday party. The big cake can be complimented by little cupcakes that fit the theme of the birthday party.

Some favorite birthday party recipes are mice cupcakes, pizza rollups and banana boats for quick fun treats. These kid’s birthday party ideas will delight any birthday child.

Mice Cupcakes

Ingredients:

  • 1 pkg. Chocolate Cake mix
  • 8 scoops vanilla ice cream
  • 16 sandwich or mint cookies
  • Small candies-red hots
  • M&M's candies or skittles
  • 1 pkg. shoestring licorice

Instructions:

1. Prepare cake mix according to package directions for cupcakes
2. Fill muffin cups 2/3 full
3. Bake until toothpick comes out clean
4. Cool completely and remove from pan
5. Top each cup cake with a scoop of ice cream
6. Decorate each cupcake to resemble a mouse
7. Use 2 oreo or mint cookies for the ears
8. Use the candies for eyes nose and mouth
8. Cut licorice and insert into the ice cream for the whiskers
9. Place cupcakes in the freezer for 1/2 hour before serving

Banana Boats is a cool summer idea for a Birthday Party Treat

Ingredients:

  • 1 banana per child
  • Ice cream
  • Mini marshmallows
  • Chocolate chips
  • Whip cream

Instructions:

1. Slit each banana open lengthwise
2. Put ice cream, mini marshmallows and chocolate chips in the slit
3. Add whip cream to the top
4. Enjoy!

Pizza Roll

Ingredients:

  • 2 tbsp. butter, melted
  • 1/4 tsp. Italian seasoning
  • 1/4 tsp. garlic powder
  • 1 can (13.8 oz.) refrigerated pizza crust
  • 1 cup 2% Milk Shredded Reduced Fat Mozzarella Cheese
  • 2 tbsp. chopped onions (optional)
  • 1 pkg. Pepperoni slices
  • 1-1/2 cups marinara sauce

Instructions:

1. Preheat oven to 400°F.
2. Mix butter, Italian seasoning and garlic powder until well blended
3. Set mixture aside
4. Unroll dough onto un greased baking sheet
5. Press into 15x10-inch rectangle
6. Brush with half of the butter mixture
7. Sprinkle with cheese and onions
8. Top evenly with pepperoni
9. Starting at one of the short ends roll up dough to form a log
10. Pinch seams and ends together to seal
11. Position log lengthwise, seam-side down in center of baking sheet
12. Brush with remaining butter mixture
13. Bake 15 minutes or until lightly browned
14. Let stand 5 minutes
15. Cut crosswise into 12 slices
16. Serve with the marinara sauce

Yield: 12 servings

Add your favorite cut-up fresh vegetables to the cheese and onions. You can substitute olive oil for the melted butter.

Fun Recipes for Kids

Children can get their vegetables and have fun at the same time. Children love salsa and quesadillas. Eating this Mexican inspired meal makes eating vegetables fun.

1 Vegetables - Salsa & Quesadillas Make a Great Meal or Snack

Ingredients:

  • 1 white onion
  • 1/2 bunch cilantro
  • 3 tomatoes
  • 1 large jalapeño pepper
  • 1 small can of chili peppers
  • The juice of 2 limes
  • 1/2 tsp. salt
  • 1/2 clove garlic (chopped)
  • 1/2 tsp. sugar

Instructions:

1. Wash all the vegetables.
2. Use the vegetable chopper to chop the onion, cilantro, and tomatoes.
3. Set these ingredients aside.
4. Finely chop the jalapeño and the chilies.
5. Add the jalapeño and the chilies to the tomato mixture.
6. Add the rest of the ingredients and stir well.

Wash your hands with soap and water after cutting up the vegetables to avoid getting hot pepper into your eyes. The whole family will enjoy this salsa. Use immediately or refrigerate. There is nothing more delicious than homemade salsa. You may never purchase pre made salsa again.

After the ingredients have blended in the refrigerator, the salsa tastes better. You can adjust the recipe to appeal to each family member. To make a milder salsa substitute sweet peppers for the jalapeño and chili peppers. To make a hotter salsa simply increase the onions and peppers.

There is an entire serving of vegetables in 1/2 cup of salsa. Use the salsa to top these delicious quesadillas

Chicken Quesadillas

Ingredients:

  • 3 oz. boneless chicken breast, cut into bite-sized pieces
  • Nonstick cooking spray
  • 1/2 onion, finely chopped
  • 2 cloves garlic, minced
  • 2 corn or flour tortillas
  • 2 oz. jalapeno Jack cheese

Instructions:

1. Preheat oven to 350F
2. Spray skillet with nonstick cooking spray
3. Add chicken
4. Sauté chicken until cooked through and juices run clear
5. Remove chicken from skillet and set aside
6. Sauté remaining onion and garlic in nonstick skillet for 2 minutes
7. In another bowl, mix chicken with half of the salsa and set aside
8. Spray baking sheet with nonstick cooking spray
9. Place tortilla on baking sheet
10. Spread chicken and salsa mixture on the tortilla
11. Spread cooked garlic and onions over chicken
12. Sprinkle cheese evenly over onion and garlic
13. Cover with another tortilla
14. Bake for 10 minutes until cheese is melted
15. Cut into four wedges and serve with remaining salsa

Serving size: 2 wedges

Cake Recipes - Scrumptious Easy Layer Cake

The best thing about this cake, other than it being so easy, is that you can make it to please your taste buds! You really can choose any ingredients that you would like, but these are the ones that I have used in the past:

Cake
Pudding
Fruit
Cool Whip

Here are some other ideas of things that you may wish to choose from:

Cake: yellow, angel food, chocolate, strawberry, white

Pudding: vanilla, chocolate, strawberry, lemon, pistachio

Fruit: pineapple, cherry pie filling, bananas, peaches, pears (you can use as many fruits as you would like)

Chocolate chips, cinnamon candy, coconut, walnuts (or any other kind of nuts), are also great options.

Now to "build" your new layer cake, all you need to do is, layer the ingredients into a clear glass bowl. The presentation is so beautiful because you can see all the colors & ingredients through the glass! You may want to choose ingredients & colors to match whatever holiday that you are preparing the cake for.

Start with the cake as the first layer - (break into pieces or cut into squares), add fruit, then some pudding, then cool whip. Cake - fruit - pudding - cool whip, etc - until the bowl is almost filled. You can then top with items like: coconut, nuts, or cherries if you wish.

If you'd like to have colored coconut, just place coconut in a ziplock bag with a few drops of food coloring, and mix until desired color is reached.

An example of a nice holiday display; a large platter with the glass bowl in the center. Add green coconut "grass" around the platter. Then, add a few nicely placed Easter eggs (candy, or the real ones =) around the green grass.

Dinner Quick! A Recipe for Success- Parmesan Fish Fillets

When you need dinner quick, this recipe for Parmesan Fish can be on the table in the time it takes to go through the drive thru at your favorite take out place. As a bonus this recipe is an easy clean up as well.

The secret to a successful home cooked family dinner on busy nights is planning ahead. A pre-planned menu that is quick and easy to prepare will take the stress out of the evening and be enjoyed by all - the cook included. Planning weekly menus and shopping for the week in advance eliminate the two biggest stress factors and time wasters from your evening. In addition to a weekly menu plan, keep a few emergency plans on hand for evenings when you are absolutely out of time and need dinner quick. A recipe for a 15 minute meal can be a healthy and money-saving option for your family.

This recipe is easily expandable to fit your family size. Simply purchase the required number of fish fillets for your family and scale up the remaining ingredients. Here is a Dinner Quick Recipe that is sure to be a success with your family. Parmesan Fish Fillets

6 Tablespoons grated Parmesan cheese
3 Tablespoons flour
1 to 1 1/2 lbs. fish fillets
3 tablespoons butter
2 tablespoons snipped parsley
2 tablespoons snipped chives
Lemon garnish

  1. In shallow dish, combine cheese and flour.
  2. Dip fish into flour mixture, coating it on all sides.
  3. Heat the butter in a skillet and sauté the fish in the butter over medium heat until golden on all sides and fish flakes easily - approximately 4 to 6 minutes.
  4. Place fish on a warm platter. Pour the butter in the pan over the fish. Sprinkle with parsley and chives. Garnish with lemon wedges or slices.
To round out this dinner quick recipe, serve with a fresh salad and a loaf of garlic bread. You'll be sitting down to dinner within 20 minutes!

Monday, March 12, 2007

Red Velvet Cake

This delicious cake is a Southern specialty and has been in my family for many generations. In the early days, red velvet cake was the signature dessert in upscale restaurants and hotels. But today this rich and sweet dessert topped with cream cheese frosting is enjoyed at many celebrations. This moist cake is a good choice to serve for special occasions, and is perfectly suited for your Easter feast.

A few years ago, my sister Debra and I were celebrating her wedding anniversary and my birthday. I doubled the recipe for this cake and baked it in a half-sheet cake pan. Our guests just love it. It was a nice change from the traditional decorated birthday cake. Try it for your next celebration. You’re be glad you did!

2 1/2 cups self-rising flour
1 1/2 cups white sugar
1 cup vegetable oil
1 teaspoon baking soda
1 teaspoon distilled white vinegar
1 teaspoon vanilla extract
2 eggs
1 cup buttermilk
2 ounces red food coloring

Preheat oven to 350 degrees. Grease and flour three (8 inch) round pans. In a large bowl, mix together sugar, oil, and eggs. Add food coloring and vinegar to buttermilk. Add baking soda to flour.

Add flour mixture and buttermilk mixtures alternately to the sugar mixture. Mix well. Stir 1 teaspoon vanilla into batter. Pour batter into prepared pans. Bake for 20 to 25 minutes, or until tester comes out clean. Remove from oven, and cool on wire racks.

Cream Cheese Frosting

1 (8 ounce) package cream cheese, softened
1/2 cup butter, softened
4 cups confectioners' sugar
1 teaspoon vanilla extract
1/2 cup chopped pecans

Mix together cream cheese, butter or margarine, confectioners' sugar, and vanilla. Stir in nuts. Spread over cooled cake.

Sunday, March 11, 2007

Cooking With Tropical Fruit - Pomegranates

In Roman Mythology, Persephone loved the seeds of the pomegranate fruit so much that their flavor and allure were the ruin of her. It is said that the fruit caused Pluto the ability to overpower Persephone and never again could she return to earth. This prevention of the Goddess Persephone to return to the earth was the cause of winter. We who love snow, skiing and ice–skating can (in a mythological and theoretical sense) thank the pomegranate. Thank you, Pomegranate, for indirectly creating this cold, sporty, and snowy, pillowy season!

It is a wonderful thing to get a present from someone that is exactly what you like. Similarly, it is great to give someone exactly what they want. Usually, someone who likes to cook may be very interested in recipes and food arranged with care in a beautiful gift basket. With fresh fruit you can include recipes for relishes, sauces, tarts, pies, pastries, and creams – you can even give a gift basket designed to include tropical fruits.

So, perhaps you will want to look for a tropical fresh fruit basket when you consider what kind of present to purchase for anyone who is a culinary enthusiast. The fruits you include in you basket will not only be fresh fruits, but the tasty, sweet surprise of fresh tropical fruits; tropical fruits such as the pomegranate are very popular.

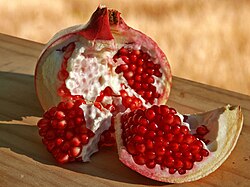
Pomegranate fruits are labor – intensive, with the thickness of their skin that results in their simple, durability and transportability. The fruit originates in the Middle East. It has been told that the Moors brought and introduced pomegranates to Spain, where the fruit actually, subsequently, became their national emblem.

A pomegranate grows on a very spine – like shrub. The fruit is round, it is a reddish – gold, and healthy pomegranates measure between two to five inches in diameter. They are distinguished by a crown – like tip, which is actually the base of the fruit, or the blossom’s end. The taste of their crunchy, juicy, seeds or kernels inside is often irresistible, as well as inspirational. Pomegranate has a wonderful flavor that appeals to many culinary artists.

The pomegranate kernels are surrounded by a creamy – colored outer membrane, which is bitter and not edible. To remove the seeds, first you must cut the blossom end and you will have to remove some of the white pith – however, do not break the red pulp that surrounds the seeds. It is recommended that you score the skin into approximately four segments. Break the fruit into halves, then break those halves into halves following your score – lines.

To remove the seeds bend back the rind of the pomegranate and simply scoop them out. If you are not a big fan of seedy stuff, you may want to doctor the fruit by extracting the juice for sauces etc. With a good juice extractor or strainer – the juice of just about any fruit can be removed without any seed sediment or large pulp.

A pomegranate will make a beautiful, surprisingly, tropically tasty icing, dressing for salads, a wonderful addition to a chutney or tropical relish, pink sorbet, even great pomegranate pudding recipes are even out there and available for you to try!

Cooking Without A Recipe - Tastier Step By Step

I was once one of those people that always used recipes. I was afraid to venture away from those wonderful cards and comforting pieces of paper with amounts, ingredients, and instructions. I thought I needed to be told exactly how to make something; I wouldn’t increase, decrease, or substitute anything.

After awhile, I became tired of the confinement from those 4x6 cards. I began venturing into a new world – a world without recipes. I started by substituting ingredients, one vegetable for another. Then I started adding spices. Now, I view myself as a full-blown “cook”; I have no problem making dinner without a recipe. Gaining this culinary freedom can be done step by step.

Start by viewing cooking as two things – a hobby and a science experiment. Like with any hobby, the first few times you complete a project it may not turn out exactly how you expected, but you keep trying until it does. In science, you create a hypothesis, test the hypothesis by doing the experiment, and then observe what happens and come to a conclusion. If your conclusion leads you to another hypothesis, you try it again.

Cooking should be viewed the same way. Throw the ingredients together, taste the result, and decide how it is. Like a hobby, if it doesn’t work the first time, try again. I often make meals and critique afterwards, asking myself, “What flavors are missing? Is the consistency right? What things would I add or remove next time to make it taste better?”

Granted, if you always use recipes venturing into the unknown world of cooking without them can be intimidating. Below I’ve listed a few suggestions for ‘baby steps’ toward cooking on your own.

- Substitute, add, or remove vegetables (and eventually other ingredients as well). This is one of the easiest things to do. If you don’t like onions and the recipe calls for them, take them out. If the recipe calls for corn and you like peas, try substituting. If what you’re making might be tastier with some broccoli, throw it in.

- Know what you like. This may seem simple, but know what you like. If you’re constantly coming across a flavor that appeals to you, be able to figure out what that flavor is. One of the best tricks I have learned is the ability to taste something and tell what spices are in it. To do this, see the next tip.

- Use your nose. As humans we often neglect our sense of smell, which can be so helpful when cooking. Often if the dish I’m preparing ‘needs something’, I open my spice cupboard and start sniffing. The smells of spices go together, so trust your sense of smell and you’ll come across what you need.

- Know your spices. In science, you often gather information and conduct research. Do the same with your spices – know which spices often go together and what types of cuisine use which spices.

- Get creative. Much like other hobbies, creativity is the key. Don’t be afraid to get creative in your cooking either. My sister-n-law roasts squash with cinnamon and chili powder. I wouldn’t have thought to put those two spices together, but the outcome was delicious.

- Trust yourself. The more you do this, the better you’ll get. In the meantime, have some frozen pizzas and sandwich makings on hand just in case.

Be confident! Cooking without recipes or even using recipes as guidelines rather than strict instructions can open you up to a wonderful world of culinary freedom. You will soon find that you can create tastier meals step by step.

How To Makes Smores - A Purist's View

S'mores are one of the best campfire treats in the world (right after pudgie pies) with gooey toasted marshmallow melting smooth and luscious milk chocolate that’s nestled between two crisp pieces of graham cracker. Yummmm……I want one (okay, two or three) right now (even though as I am writing this it is snowing outside and there is already more than 2 feet of snow on the ground.)

But although I have been brave and adventurous about trying many variations of s'mores I am still a purist at heart. To me there is only one way to make them and the choice of the three ingredients needed (marshmallows, chocolate, and graham crackers) is as important as the preparation process.

Marshmallows – First of all, the marshmallows need to be fresh. Don't try to use up the half bag of marshmallows leftover from last year that are as hard as a rock. Crack open your wallet and spend a dollar or two on a fresh bag. Campfire brand marshmallows are best if you can find them, but Kraft's are pretty good too. Buy the big ones. Don’t mess around with the miniature marshmallows.

Chocolate - There’s only once choice and that is a Hershey’s milk chocolate candy bar - 3 pieces per s’more.

Graham crackers - Honeymaid honey grahams are the best. Don’t try to get creative and use the cinnamon flavored ones - they’re just yucky with s’mores.

Preparing the s’more is as important as the ingredients. But let's talk about equipment first. In the "good old days," before restrictions on disturbing anything in nature at campgrounds and parks, if you wanted to toast marshmallows you went to a tree and broke off a long skinny branch. You pushed your marshmallow on the branch and started toasting. That's what I did as a kid (I didn't go camping as a child but we often toasted marshmallows over the hot coals of our charcoal grill at home). It didn't matter that the marshmallow often tasted faintly of tree sap nor did we ever stop to consider how many bugs or birds had touched that piece of wood and left things on it that are better left unsaid.

There are now roasting forks available at any large discount store or sporting goods store with an outdoor/camping section. Buy a hot dog fork instead of a marshmallow fork and skip the fancy retractable or folding ones. They have a tendency to retract or fold when you don't want them to. A hot dog fork works better than a marshmallow fork because the two prongs are farther apart which makes it easy to roast two marshmallows at once and because they are usually longer than marshmallow forks. Plus, then you'll have a fork that can do double duty, roast marshmallows and cook hot dogs or sausages. You can get a good quality hot dog fork for under $10 and sometimes for less than $5.

Okay, let's get back to making that s'more. Place one or two marshmallows on the hot dog fork. Toast the marshmallow to a golden brown over the campfire, remembering to turn the marshmallow so it’s toasted on all sides, not just on the third of it that’s closest to the fire. Notice that I didn’t say to start it on fire and char it to unrecognizable blackness. Marshmallows are not meant to be ignited and charred to a crisp. If your campfire is shooting up 3 foot flames, wait. Marshmallow roasting is best done with the wood is ashy and has glowing embers, which means you will have a hot fire with very little flame. Immediately transfer the marshmallow to a graham cracker half that has 3 pieces of Hershey’s milk chocolate on it (or both marshmallows if you managed to get them both toasted without losing one to the campfire and if you like a really gooey s'more; otherwise be a "sharer" and give the extra marshmallow to someone else). Using the other graham cracker half, squish the marshmallow so that it covers all the chocolate to start melting it. Stop squishing when the marshmallow starts oozing out the sides of the graham crackers.

Then quickly eat it before someone steals it from you and enjoys the perfect s’more you have made. Share the secrets of making smores with everyone you know and encourage them to practice; otherwise you'll be spending all your campfire time making s'mores for everyone else and what fun is it to make them if you don't get to eat them?

And if someone tells you that you can make a smore in the microwave that tastes just as good as one made over a campfire, they are a liar or they have never had s'more made over a campfire. Oh and I forgot one last thing you will need and that is wipes to clean up your sticky and gooey hands after eating your masterpiece!